Tips on Building Your Own PC
Building your first PC is less like buying an appliance and more like assembling IKEA furniture that boots. The short answer to what you need: a motherboard, CPU, RAM, storage, a power supply, a case, and a graphics card if your processor lacks integrated graphics. That’s the whole recipe. What separates a smooth first build from a weekend of frustration isn’t the parts list, though. It’s the order in which you do things, and whether you test before you commit.
I’ll say this upfront. Expect friction. That awkward moment when the cooler bracket won’t line up is not a sign you’re failing. It’s the moment you start actually learning how a desktop PC fits together. I’ve been building PCs since I was seven, and that early start taught me one thing above all else: patience with the process.
What Parts Do You Actually Need for a First Build?
Core components
Seven parts make a working machine. Motherboard, processor, memory kit, an SSD, PSU, chassis, and cooling. Everything else is optional flavor, RGB controller included. If you’re stepping into a gaming PC, the graphics card becomes the eighth non-negotiable, since an Intel Core i7 with integrated graphics will run a spreadsheet beautifully and a modern title badly.
Compatibility checkpoints
Socket first. An AMD chip won’t drop into an Intel board, and even within one brand, new motherboards arrive with fresh sockets that orphan last generation’s CPUs, a churn that community threads about socket transitions track obsessively. Then check RAM generation, since a DDR4 motherboard rejects DDR5 outright. Then physical fit: does the ATX board match the case, does the cooler clear the memory height, does the GPU clear the drive cage. Running your list through PCPartPicker’s build guide database catches most of these automatically, and honestly there’s no reason not to.
Budget split
- Roughly 35 to 45 percent on the graphics card if gaming is the point
- 15 to 20 percent on the CPU, more if you’re editing video or compiling
- 10 percent on the power supply, never less
- The remainder split across memory, storage, chassis, and cooling
That allocation shifts hard for creative work, where the hardware balance breakdowns for video editing workstations push memory capacity ahead of raw GPU muscle.
Prepare Your Workspace and Tools
Surface and lighting
A wooden table beats carpet. Bright overhead light beats a phone flashlight held in your teeth. Give yourself twice the space you think you need, because the motherboard box, the PSU box, and the accessory kit bags all end up sprawled across the desk.
Static precautions
Touch a bare metal part of the case periodically. Don’t build in socks on a rug in winter. Electrostatic discharge rarely kills a PCB outright, more often it causes the maddening kind of intermittent instability nobody can diagnose six months later.
Tool kit
One Phillips #2 screwdriver, magnetized. Zip ties. A pair of scissors. That’s the honest core of a PC tool kit, though the workspace preparation advice from Tom’s Guide on gaming rig construction reasonably adds a small parts tray so screws stop vanishing.
Test Outside the Case Before Final Assembly
Bench setup
Sit the motherboard on its own box. Seat the CPU, one stick of RAM, the cooler, and connect the PSU. That’s your test bench.
Boot verification
Plug in a monitor, hit power, watch for the BIOS splash. If you see it, you’ve validated the expensive half of the build before a single screw goes into the chassis. Tom’s Hardware’s step-by-step assembly walkthrough treats this as standard practice, and skipping it is the single most common reason people end up tearing a finished build back apart.
Failure isolation
No POST? Reseat RAM, try the other channel, confirm both the 24-pin and the CPU power connector are actually clicked in. Isolate one variable at a time.
Assemble the Motherboard Tray Components
CPU seating
Align the triangle on the chip with the triangle on the socket. Zero force. If you’re pressing, stop.
RAM slot placement
Two sticks go in slots two and four counting away from the CPU. That’s dual-channel. Populating slots one and two instead costs you real bandwidth, and your Corsair kit will benchmark like it’s cheap.
Cooler mounting
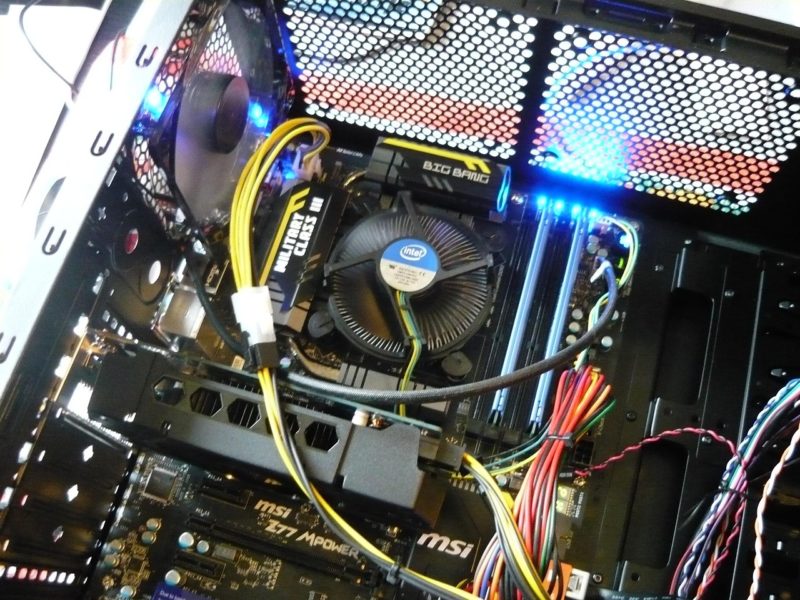
Tighten in a cross pattern, a little at a time. Intel stock coolers use push pins that need a firm click; AMD processors typically ship with a bracket that’s more forgiving. Bigger air towers and something like a Corsair H100i AIO need their brackets test-fitted before paste goes on.
How Should You Install the Case, Power Supply, and Storage?
Standoffs and screws
Count the standoffs against your motherboard format. An extra brass standoff under a spot with no screw hole shorts the board. PC cases sometimes ship with extras preinstalled for a larger size motherboard, so verify rather than assume.
New PSU cables only
Use the cables that came in the box with your unit. Never the old ones from a previous supply. Pinouts differ between vendors, and the resulting short is exactly the sort of avoidable disaster that GamersNexus documents among beginner assembly mistakes.
Drive placement
An M.2 drive like a Corsair MP600 slots directly into the board under a heatsink. SATA drives go in the cage. Nothing exotic here.
Plan Airflow and Cable Routing With Intent
Intake and exhaust
Front and bottom pull in, rear and top push out. Slight positive pressure keeps dust out of the filters rather than the fins.
Fan orientation
The arrow on the frame shows flow direction. Half of new builders install at least one fan backward, which is fine, we all do it once.
Cable channels
| Route | What goes there | Why it matters |
|---|---|---|
| Behind the tray | 24-pin, PCIe power cables, SATA | Keeps the airflow path clear |
| Top edge | CPU EPS cable | Shortest run to the connector |
| Bottom right | Front panel, RGB cables | Hides the ugliest bundle |
First Boot, BIOS Setup, and Operating System Install
Power on. Enter BIOS, usually Delete or F2. Enable XMP or EXPO so your memory runs at its rated speed instead of a lazy default, confirm the boot drive is detected, then check the CPU temperature at idle. Install Windows from a USB stick, then chipset drivers from the board maker, then GPU drivers from Nvidia or AMD directly. In that order.
Common Beginner Mistakes and How to Fix Them
Undersized power supplies top the list, and buying with roughly 20 percent headroom above peak draw saves a rebuild later. Forgetting the CPU power connector comes second. Overtightening the cooler and cracking the socket retention comes third, thankfully rarer. Newegg’s rundown of first-time builder verification steps is blunt about the timeline too: budget four hours, not one.
Build a Journal and Upgrade in Measured Steps
Write down part numbers, BIOS version, idle and load temperatures, voltages. Sounds tedious. It becomes your personal playbook, and when you swap in a faster GPU eighteen months from now you’ll have real before-and-after numbers instead of vibes. Browsing completed rig cost estimations from other builders sharpens the same instinct: upgrade one thing, measure, repeat.
FAQ
Do I need thermal paste?
Most coolers ship with it preapplied. Check first.
Can I reuse an old Windows license?
Usually yes, if it’s retail rather than OEM.
Is a custom build cheaper than prebuilt?
Not always in 2026, given memory pricing, but the customization options and repairability are worth more than the margin. (See more in Building a PC vs Buying Prebuilt)
Conclusion
Your first build is a controlled experiment, not a gamble. Plan the compatibility, test on the box, route the cables with intent, and log what you learn. Do that, and you stop being someone who owns a PC. You become the person who fixes it.
Would you like to receive similar articles by email?

Paul Tomaszewski
Paul Tomaszewski is a science & tech writer as well as a programmer and entrepreneur. He is the founder and editor-in-chief of CosmoBC. He has a degree in computer science from John Abbott College, a bachelor's degree in technology from the Memorial University of Newfoundland, and completed some business and economics classes at Concordia University in Montreal. While in college he was the vice-president of the Astronomy Club. In his spare time he is an amateur astronomer and enjoys reading or watching science-fiction. You can follow him on LinkedIn and Twitter.


You May Also Like

The Evolution of Streaming Services: What to Expect in 2026

6 Top Internet Providers for Rural Areas