Installing a DIY Mini Split Heat Pump? (What You Need to Know)
Installing a mini split heat pump can be an efficient way to enhance home comfort. Picture this: a single system that keeps you comfortable, whether it’s a freezing winter day at −18°C or a scorching summer afternoon at 35°C. That’s precisely what these offer. Before diving into a do-it-yourself installation, there are several aspects to consider. We’ll walk through the main ideas that help make any project a winner.
Understanding Mini Split Heat Pumps
Mini split heat pumps are popular for their flexibility and energy efficiency. Unlike traditional systems, they do not require ductwork, making them suitable for homes without existing ducts. These systems include an outdoor and one or more indoor units, allowing customized climate control in different rooms. If you’re interested in a more hands-on approach, consider a do it yourself mini split heat pump installation to enhance your home’s comfort and efficiency.
Assessing the Installation Site
Before purchasing a mini split system, evaluate the space where it will be installed. Identify the best location for both the indoor and outdoor units. The indoor unit should be placed in a central area, away from obstructions like furniture or curtains. The outdoor unit requires a stable, well-ventilated spot, free from debris and direct sunlight.
Choosing the Right System
Selecting the appropriate system size is crucial for optimal performance. An undersized unit may struggle to maintain the desired temperature, while an oversized one can lead to inefficient operation. Consider the square footage of the area, insulation quality, and climate conditions. A general rule of thumb is 20–25 W per square metre (approximately 600–750 W per 10 m²) of cooling capacity, but a professional load calculation (Manual J or equivalent) accounts for windows, orientation, occupancy, and local climate extremes. Getting the numbers crunched by a pro shows exactly what fits.
Efficiency Metrics to Look For (2025 Standards)
Federal minimum efficiency standards effective January 2025 require 16 SEER2 and 8.5 HSPF2 for residential air-source heat pumps. For cold-climate performance, look for units on the NEEP ccASHP Qualified Product List: these deliver at least 70 % of rated heating capacity at −15 °C, with HSPF2 ≥ 9.8 and COP ≥ 1.75 at −15 °C. In Climate Zones 5–7, a NEEP-listed cold-climate heat pump is strongly recommended.
Warranty Considerations
Major brands (Mitsubishi, Daikin, Fujitsu, LG, Gree) typically require installation by a licensed HVAC contractor to maintain the full warranty. DIY-friendly brands (MRCOOL, Senville, Cooper & Hunter, Pioneer) honour their warranty with documented DIY installation, provided you follow the manufacturer’s commissioning steps and retain proof of purchase. Check the specific warranty terms before buying—a voided warranty on a $3,000+ system is an expensive oversight.
Typical Cost Ranges (2025, Illustrative Only)
- Single-zone DIY kit (pre-charged, quick-connect): $1,500–$3,500
- Multi-zone DIY system (2–4 indoor heads): $3,000–$7,000+
- Professional installation labour (added to equipment cost): $1,500–$4,000
- Dedicated electrical circuit & disconnect (electrician): $500–$1,500
Prices are illustrative and vary by region, brand, capacity, and retailer.
Refrigerant Transition: R-32 Replaces R-410A
As of January 1, 2025, the U.S. EPA’s Technology Transitions rule (AIM Act) prohibits manufacture and import of new residential air-conditioning and heat-pump equipment using refrigerants with GWP > 700. R-410A (GWP 2,088) is being phased out for new equipment; R-32 (GWP 675) is the leading replacement, with R-454B (GWP 466) as an alternative. R-32 is a single-component refrigerant with no temperature glide, lower charge volume, and higher volumetric capacity. Existing R-410A systems can be serviced and repaired indefinitely—the restriction applies only to newly manufactured equipment (Fujitsu General R-32 transition overview; EPA final rule).
Legal, Certification & Permit Requirements
EPA Section 608 Certification
Federal law (Clean Air Act Section 608) requires EPA 608 certification for anyone who handles, adds, or recovers refrigerant. Pre-charged DIY kits with sealed quick-connect fittings are the exception: they let you connect line sets without breaking the refrigerant circuit, so no certification is needed for the initial installation. However, if you ever need to add refrigerant (leak, extended line set), recover refrigerant, or dispose of the unit, you must hold EPA 608 Type I, II, III, or Universal certification. Venting refrigerant is illegal—fines start at $44,539 per day per violation (2024 adjusted) (EPA Section 608 requirements).
State & Local Licensing
HVAC contractor licensing is regulated at the state level. Many states allow homeowners to perform HVAC work on their own primary residence (e.g., Texas, Florida, California, Arizona, Colorado) but still require permits and inspections. Other states (Massachusetts, New York City, Oregon) require a licensed refrigeration or HVAC contractor for any refrigerant-circuit work. Always verify with your state licensing board before starting.
Building & Electrical Permits
- Mechanical permit: Often required for new HVAC installations, especially with exterior wall penetrations.
- Electrical permit: Almost always required for a new dedicated circuit and disconnect. Most jurisdictions require a licensed electrician for this work.
- Inspection: Even where homeowner-performed work is allowed, a final inspection is typically mandatory.
Skipping permits can complicate home sales, void insurance claims, and trigger fines. A 5-minute call to your local building department clarifies exactly what’s needed in your jurisdiction (The Climate Shop: DIY Mini Split Install Legality Guide).
Gathering Necessary Tools and Equipment
A successful installation requires the right tools and equipment. Essential items include a drill, level, wrenches, and a vacuum pump. Additionally, ensure you have the necessary brackets and mounting hardware. When your gear is all set, things move much quicker, avoiding frustrating holdups.
Understanding Electrical Requirements
Mini split systems have specific electrical needs. Ensure the electrical panel can support the additional load. A dedicated circuit is often required to power the unit safely. Familiarize yourself with local electrical codes and consider consulting an electrician if you are unsure about handling electrical connections.
Preparing for Installation
Preparation is key to a smooth installation. Begin by reading the manufacturer’s instructions thoroughly. You’ll find helpful information here about the specific model you picked up. Check all components upon delivery to ensure nothing is missing or damaged.
Installing the Indoor Unit
Mounting the indoor unit involves precision. Use a level to ensure it is straight, and secure it with the appropriate brackets. The unit should be high enough on the wall to allow proper air circulation. Carefully drill holes to connect the refrigerant lines and electrical wiring to the outdoor unit.
Positioning the Outdoor Unit
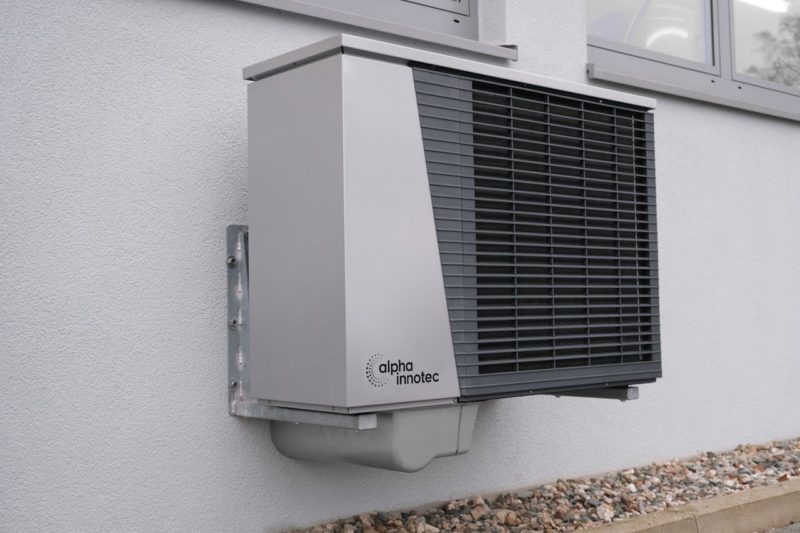
The outdoor unit requires a stable base. Consider using a concrete pad or mounting brackets to keep it off the ground. For proper air circulation, the unit needs open space all around it. Ensure it is level to prevent operational issues and minimize noise.
Connecting the Components
Connecting the indoor and outdoor units involves handling refrigerant lines and electrical wiring. Carefully follow the manufacturer’s instructions to avoid leaks or electrical faults (NEC Article 300 & 440). Use a vacuum pump to remove air and moisture from the refrigerant lines before releasing the refrigerant.
Testing the System
Once all connections are complete, it is time to test the system. Turn on the power and set the desired temperature. Keep an eye out for odd sounds or if things start running slow. Ensure that the indoor unit distributes air evenly and that the outdoor unit operates smoothly.
Maintenance Considerations
Regular maintenance ensures the longevity and efficiency of the mini split system. Clean or replace filters every 2–4 weeks during peak season (monthly minimum) to maintain air quality and airflow. Inspect the outdoor unit monthly to remove debris (leaves, grass clippings, cottonwood) and check for visible wear. Check the condensate drain line monthly for clogs—a wet/dry vacuum can clear minor blockages. Schedule professional deep cleaning (blower wheel, evaporator coil, drain pan, coil cleaning) once or twice per year; typical cost is $150–$500 depending on the number of indoor heads (Bryant Ductless Maintenance Guide; EngineerFix maintenance frequency).
Safety Precautions
Safety should always be a priority. Ensure all electrical connections are secure and insulated. Avoid working alone, especially when handling heavy components. Use protective gear like gloves and goggles to prevent injuries during installation.
Conclusion
Putting in your own mini split heat pump feels great. You’ll get a cozier home and save cash on power. Homeowners get great results when they check their property, pick the correct setup, and stick to the steps. Stick to routine maintenance. That’s how your system will run like new for many years. Get things ready and pay close attention; your installation can be rewarding and effective.
Would you like to receive similar articles by email?

Danuta Smoluk
Danuta Smoluk is a teacher with over three decades of experience teaching both children and adults. She specializes in teaching the Polish language to English-speakers. She has a master's degree in primary and early childhood education from WSP Słupsk (currently Pomeranian University in Słupsk) and had her degree validated by University of Toronto. Aside from education, she also has an interest in real estate and home improvement. She has planned and supervised many house renovations. She loves interior design, cooking, and gardening.


You May Also Like

The Dos and Don’ts of Calling the 811 Digger’s Hotline

Planning a Home Renovation? Don’t Forget to Rent a Dumpster